I blame last year on my inability to go without baking bread for more than a week. I found myself out of work for the first time in 15 years. I went nuts with making all the stuff from scratch for my family. Also, I figured go big or go home, so I taught myself how to grow wild yeast, then how to use it in baking.
Disasters were many. They were frequent. Even though each loaf was better than the previous one, it still took nearly a year of constant weekend baking to reach the point when I could declare, loud and proud, that all our bread was homemade. And damn yummy.
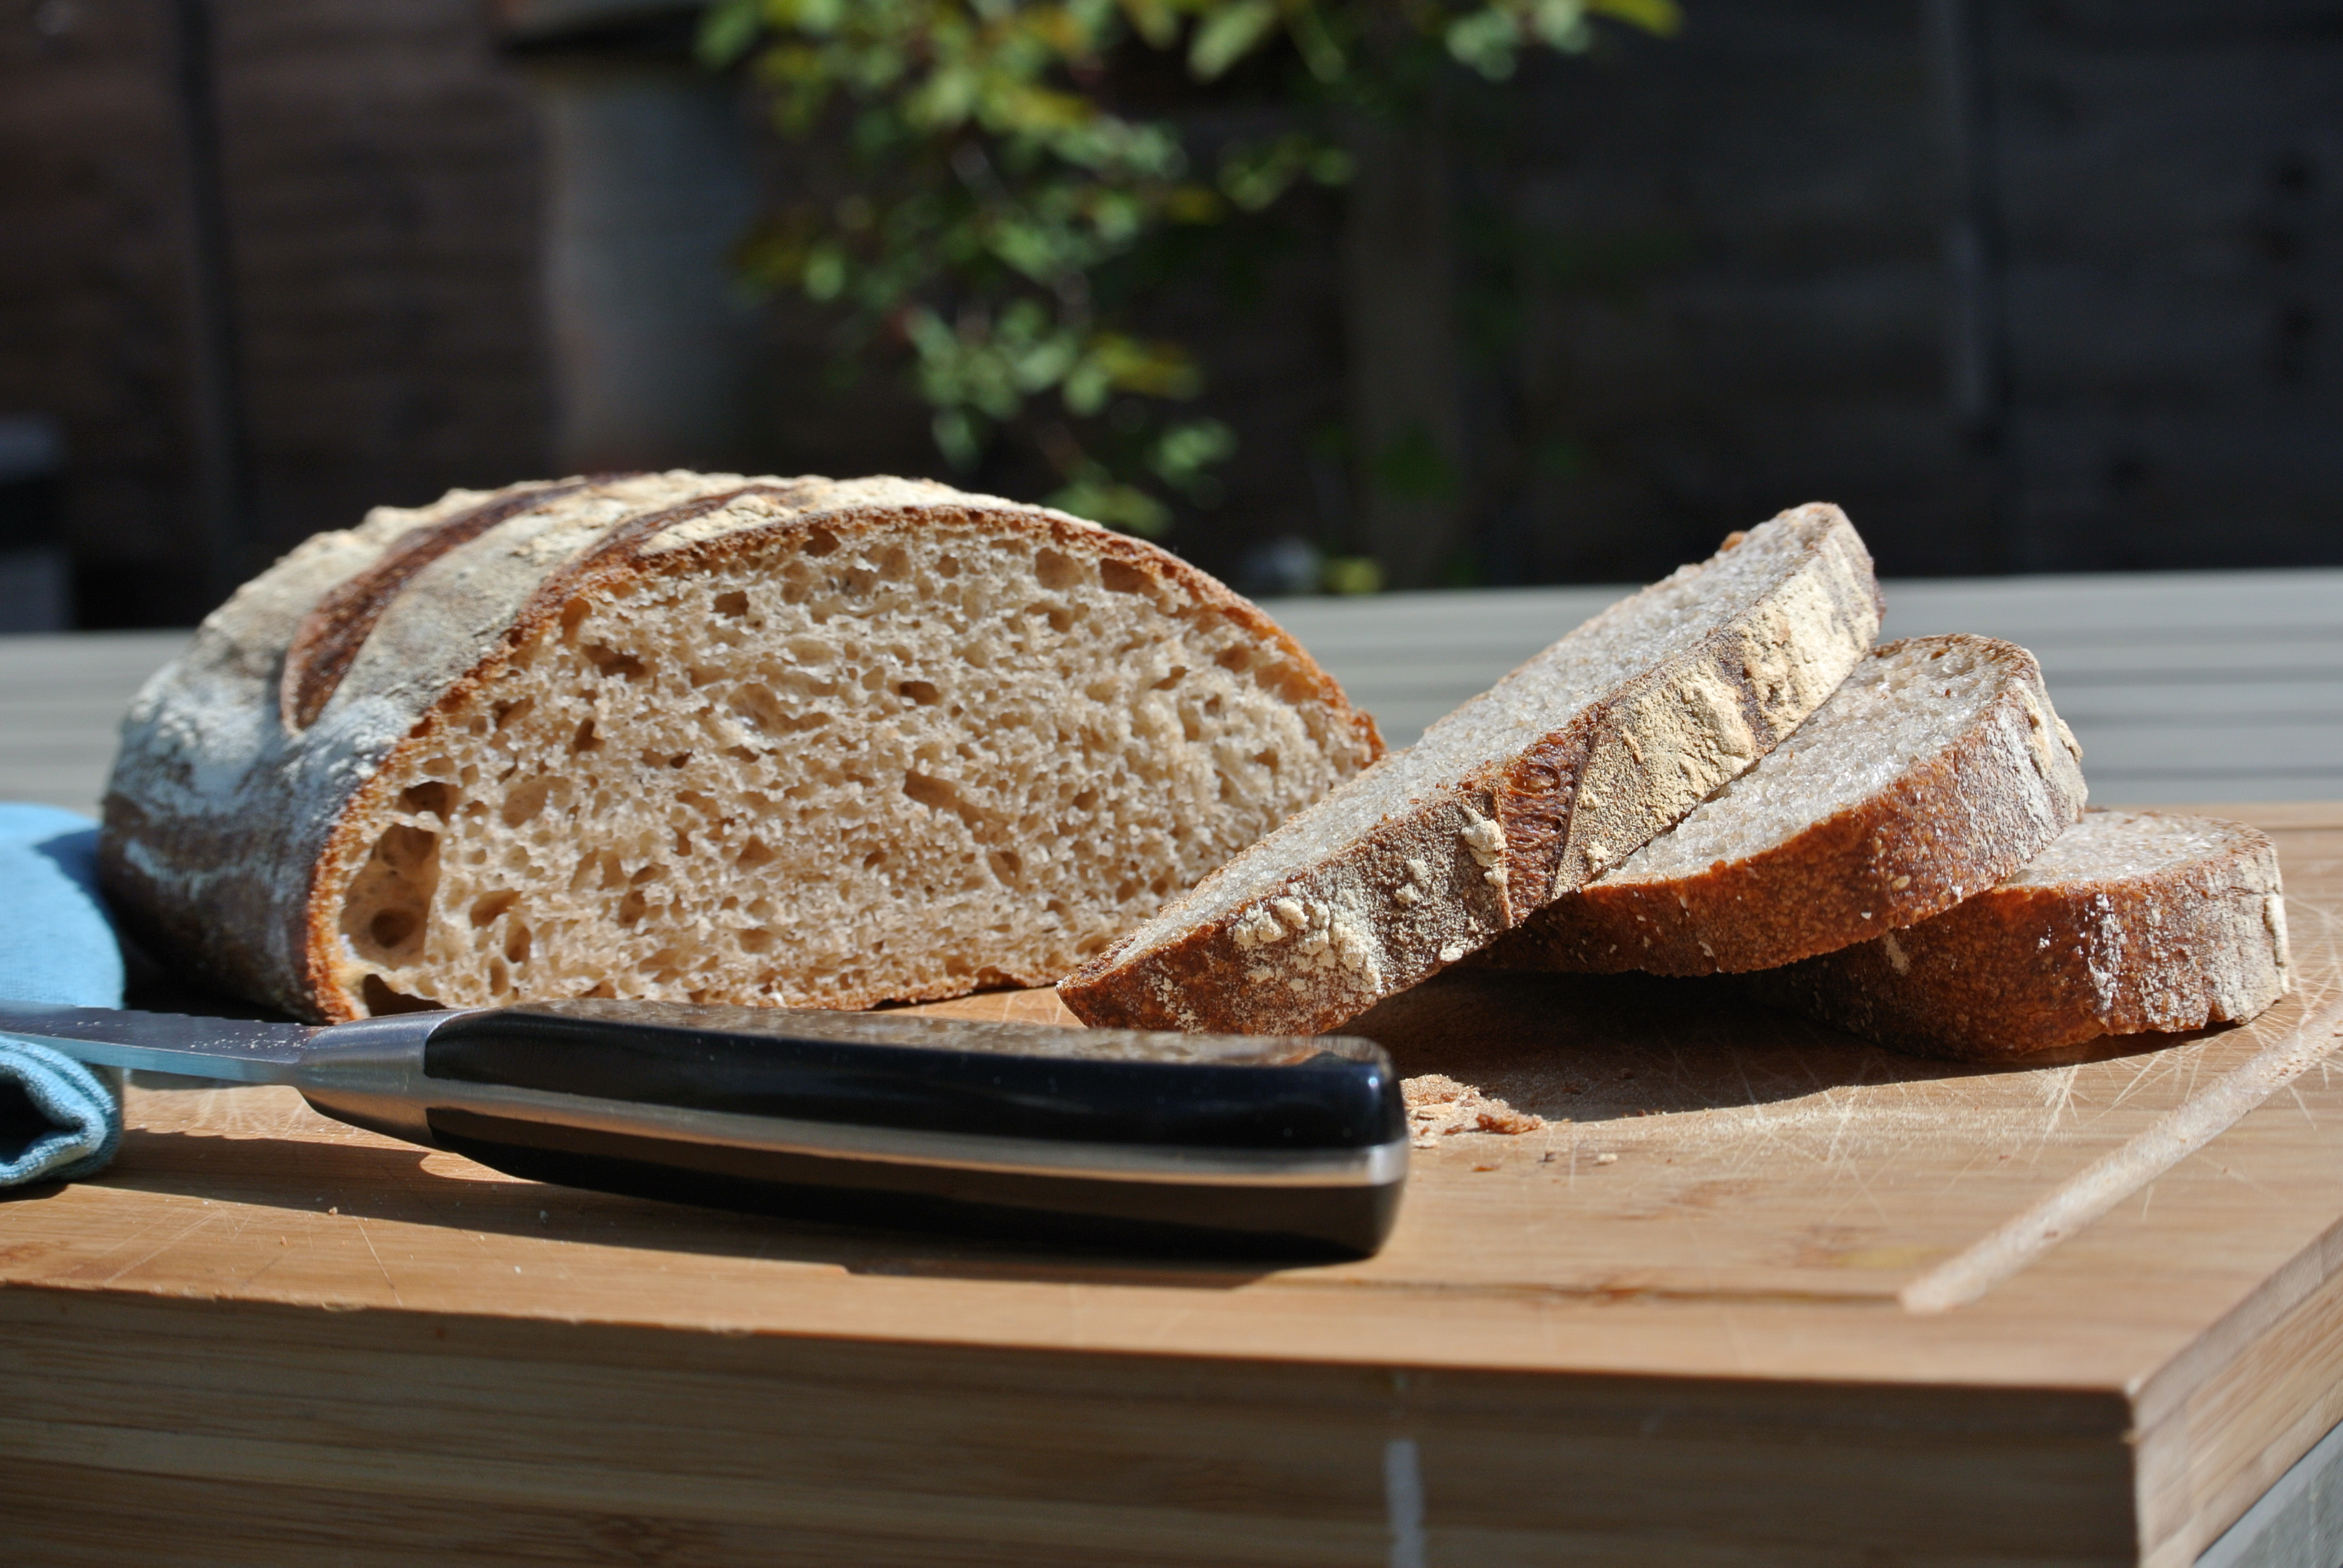
The recipe below is the perfect starting method for bakers who’ve already grown a wild yeast culture and need a basic recipe to start baking sourdough.

The 1-2-3 method is the simplest method – arithmetic-wise – for making sourdough bread. Above, I provided standard measurements to help guide you – 1 part sourdough starter to 2 parts water and 3 parts flour.
You’ll need:
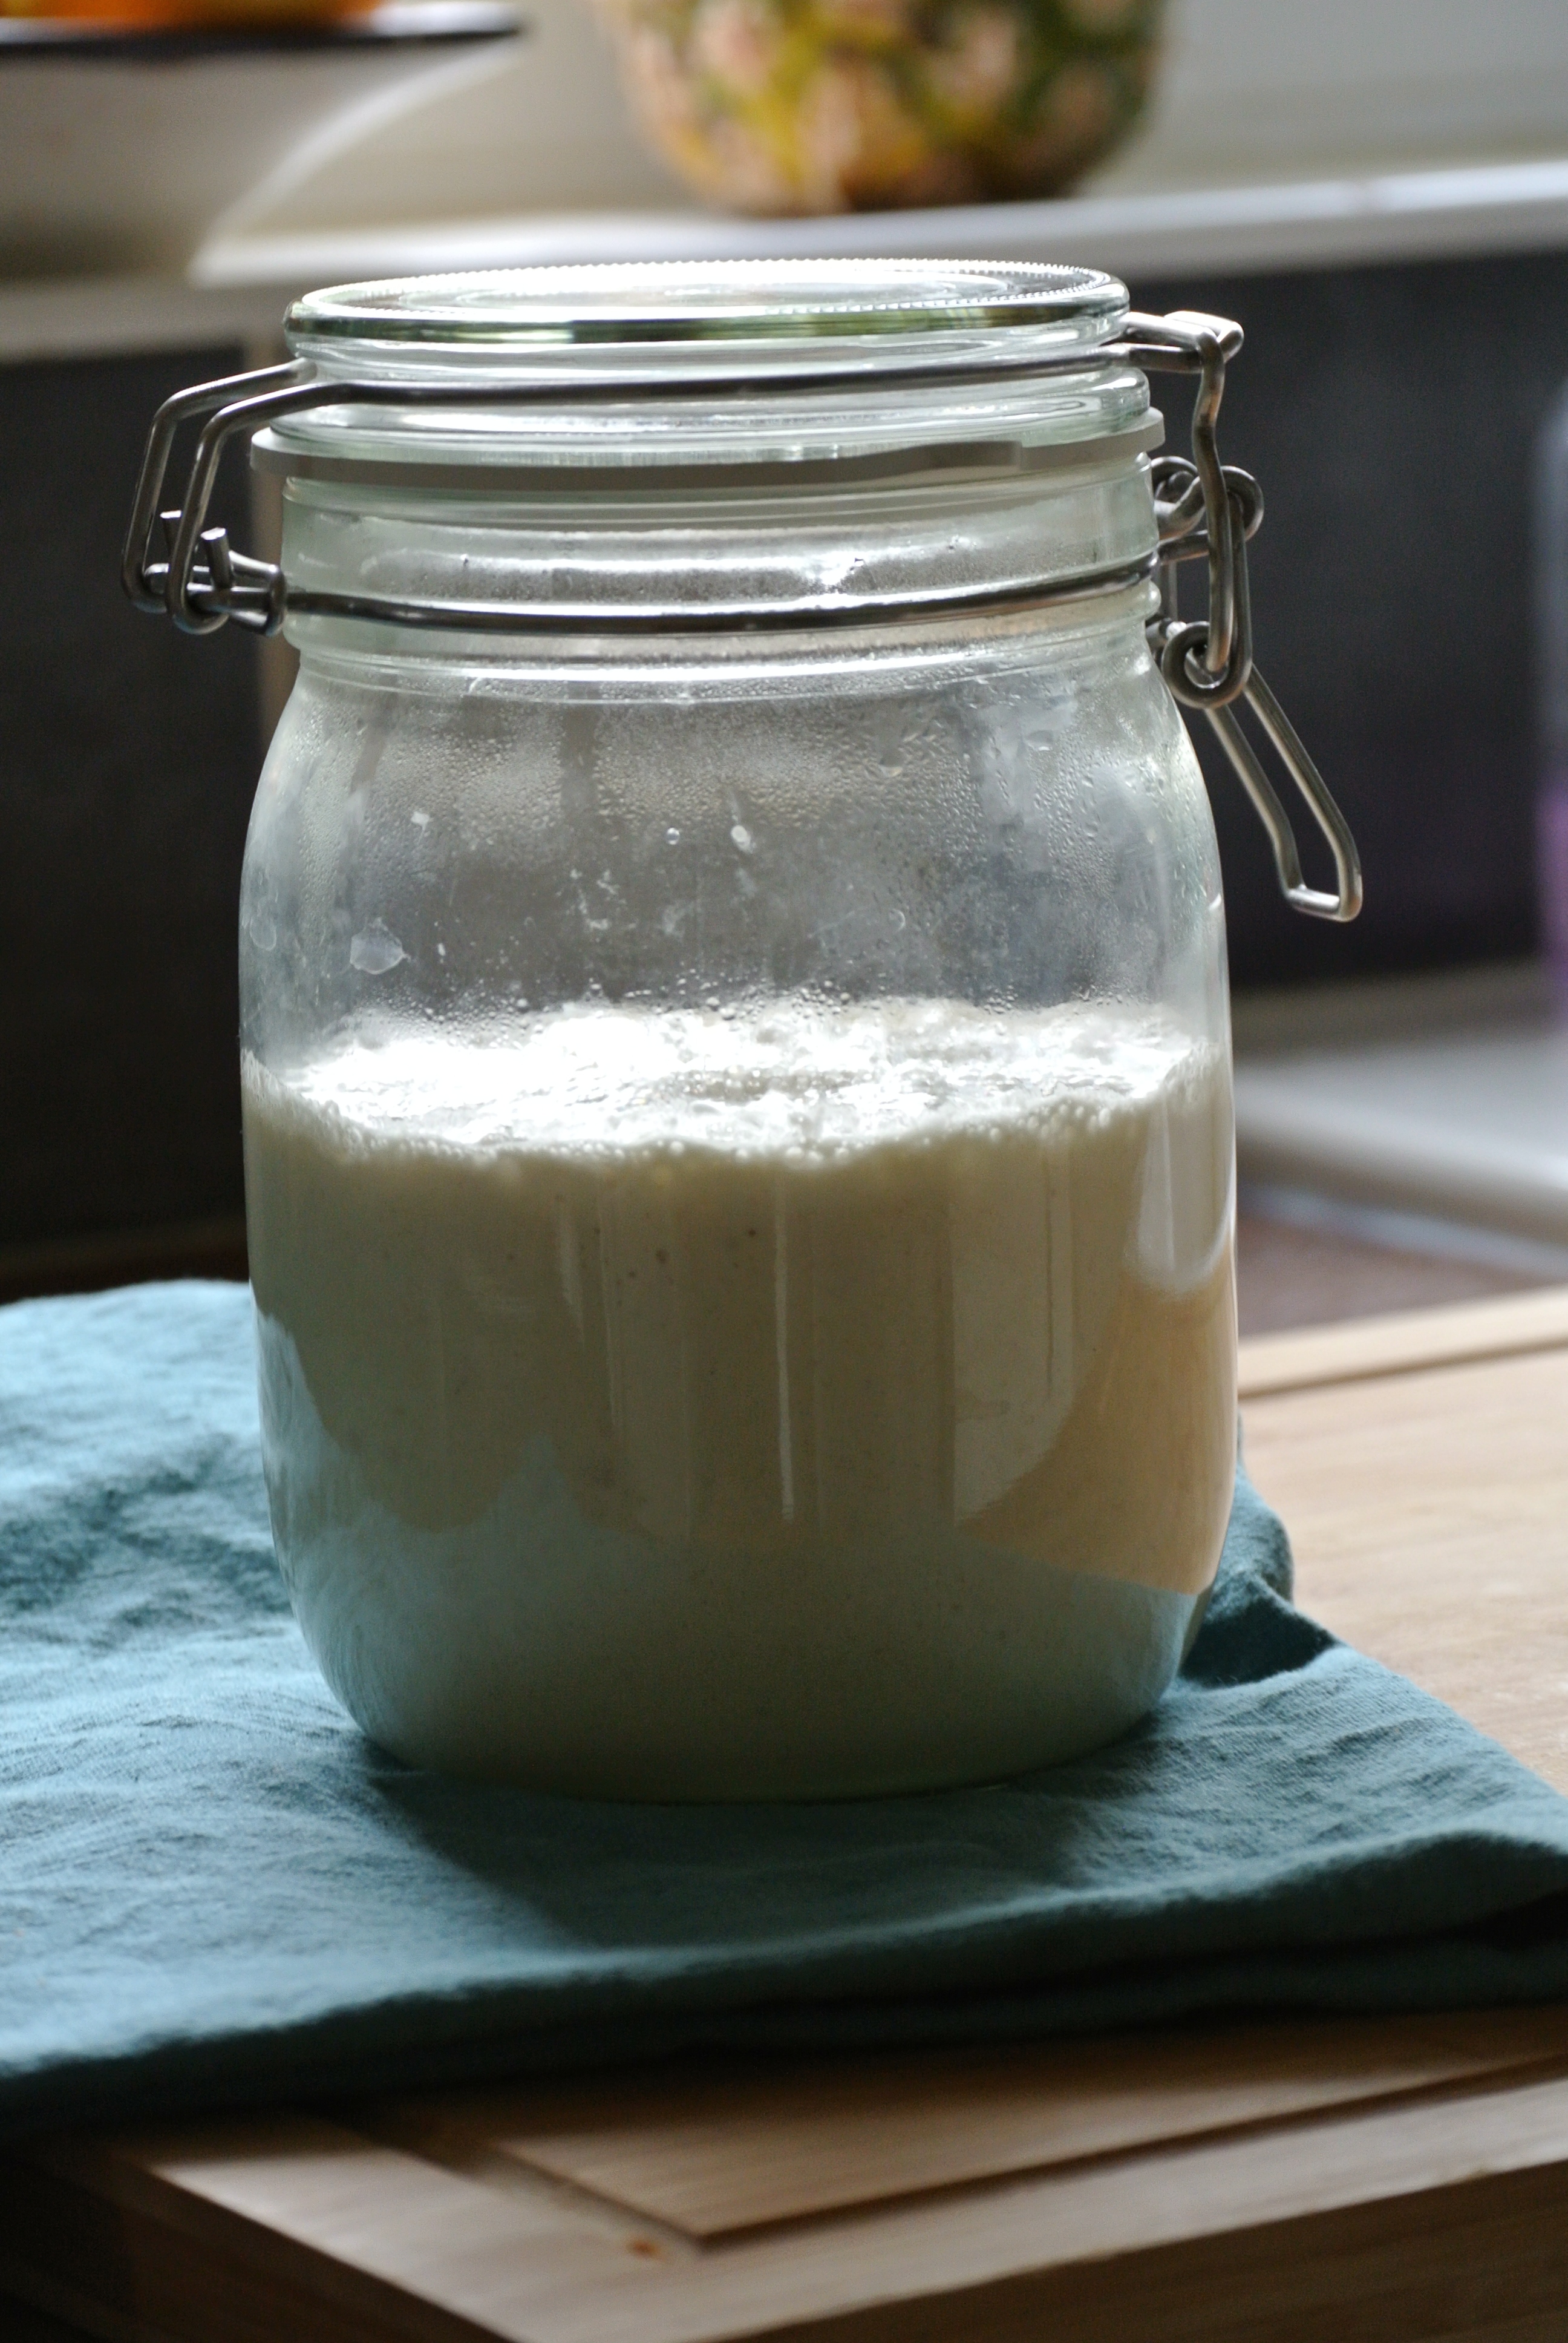
100% hydration white flour starter, fully mature – 250g
lukewarm water – 500g
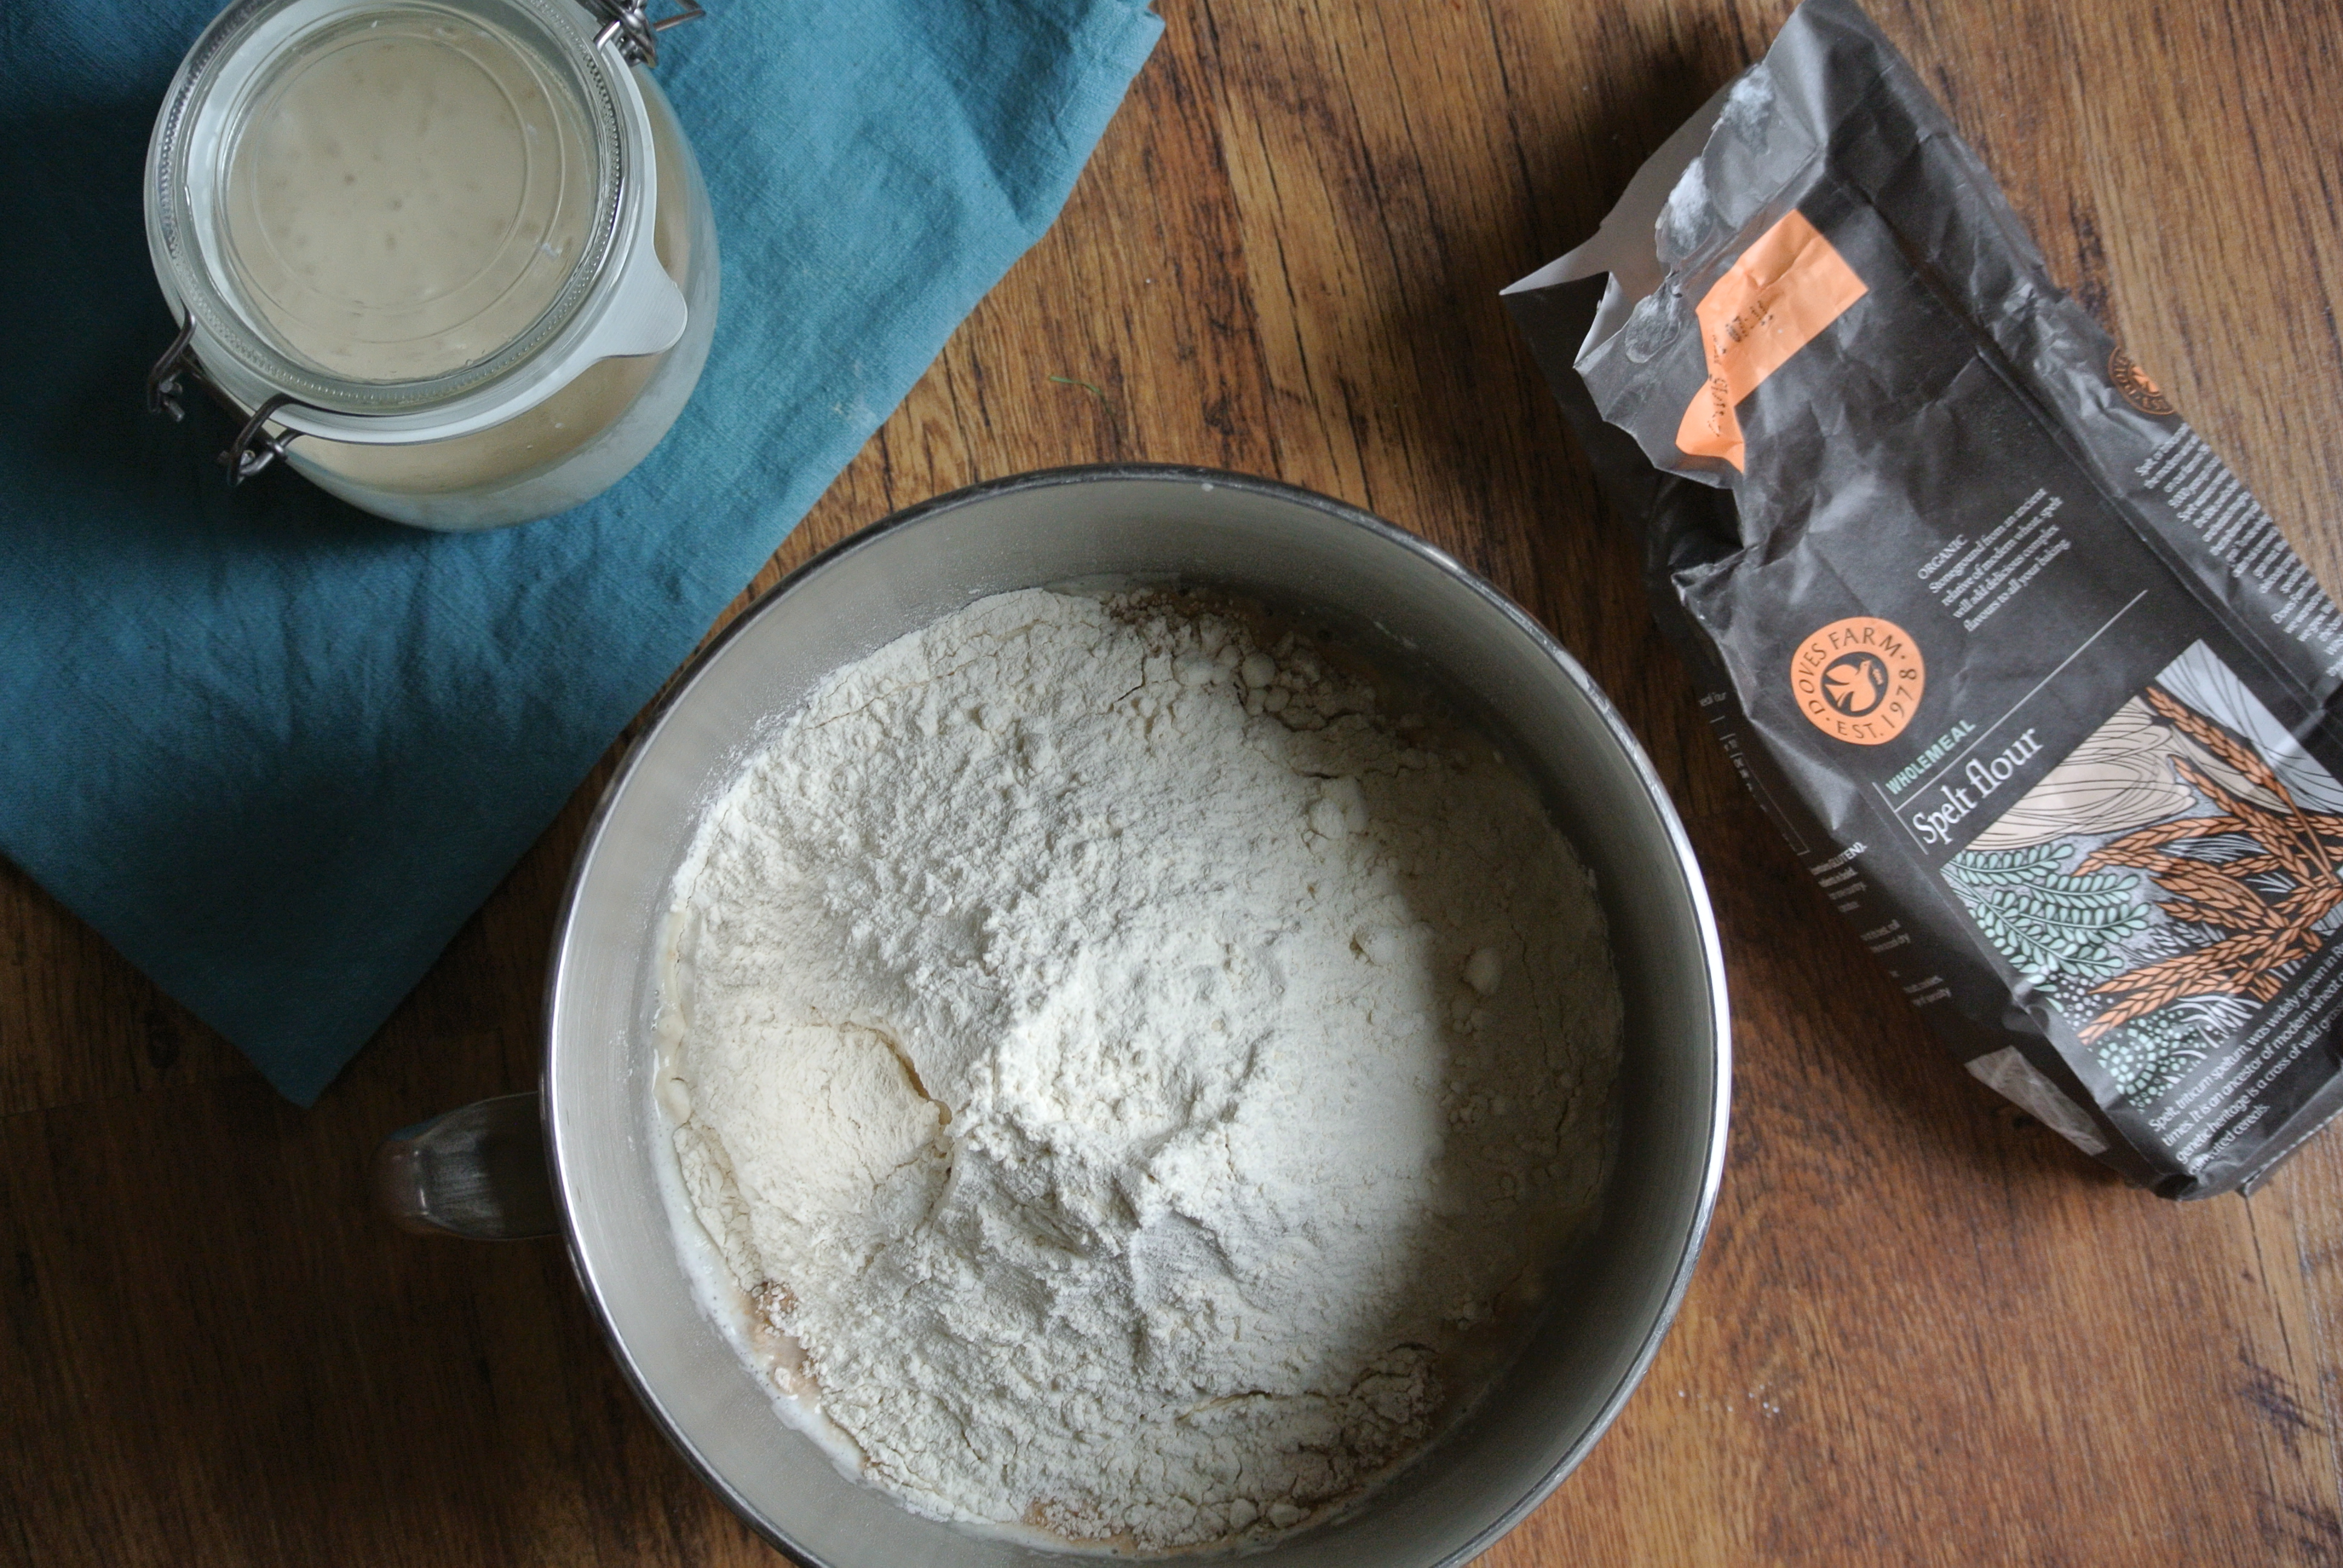
white flour – 450g
wholemeal spelt flour – 300g
salt – 16g
You can use all white flour, or you can use a combination of wholemeal / seeded wholemeal / spelt and white flours. Most blogs I’ve read recommend that white flour is at least half of the overall flour quantity. Finally, there is one more tweak I make to the measurements. I’ve noticed my flour (Allinson’s Strong White Bread Flour) absorbs water to a lesser extent, so I add 470 – 475g of water instead of the full 500g. If you’re making the bread for the first time, start with 470g of water and add more after autolyse if necessary. Your flour of choice may behave differently than mine. More details about this below.
To start, dissolve the starter into the lukewarm water, then mix in the 2 flours. You can do this by hand or in the bowl of a mixer. If you have a mixer, use the paddle attachment for this. Either way, mix until the resulting dough looks like a shaggy mass. Cover with cling film or a cotton tea towel, to avoid the dough drying out, and leave to stand for 20 – 30 minutes. This stage – the autolyse referenced above – is super important as it helps hydrate the flours and makes later kneading a lot easier and faster.
After 30 minutes, sprinkle the salt on top of the dough and mix. Again, you can use a mixer with the dough hook attached or you can start kneading by hand, directly in the bowl. If using a mixer, expect to knead 5 – 7 minutes on moderate speed. If doing it the old-fashioned way, then 10 – 12 minutes should do the trick. Your dough is ready when you can stretch a portion between your hands and obtain a window pane effect.
Right, first hurdle done. Transfer the dough into a well oiled bowl, cover with cling film and place on a warmish, no-draught surface to proof for 2 hours and 30 minutes. There’s a catch though: don’t go anywhere because you’ll need to do 2 sets of stretch & fold kneads to the dough, one every 50 minutes. Set a kitchen timer or your app reminders cause this one’s important and an actual game changer for the texture of the future loaf.
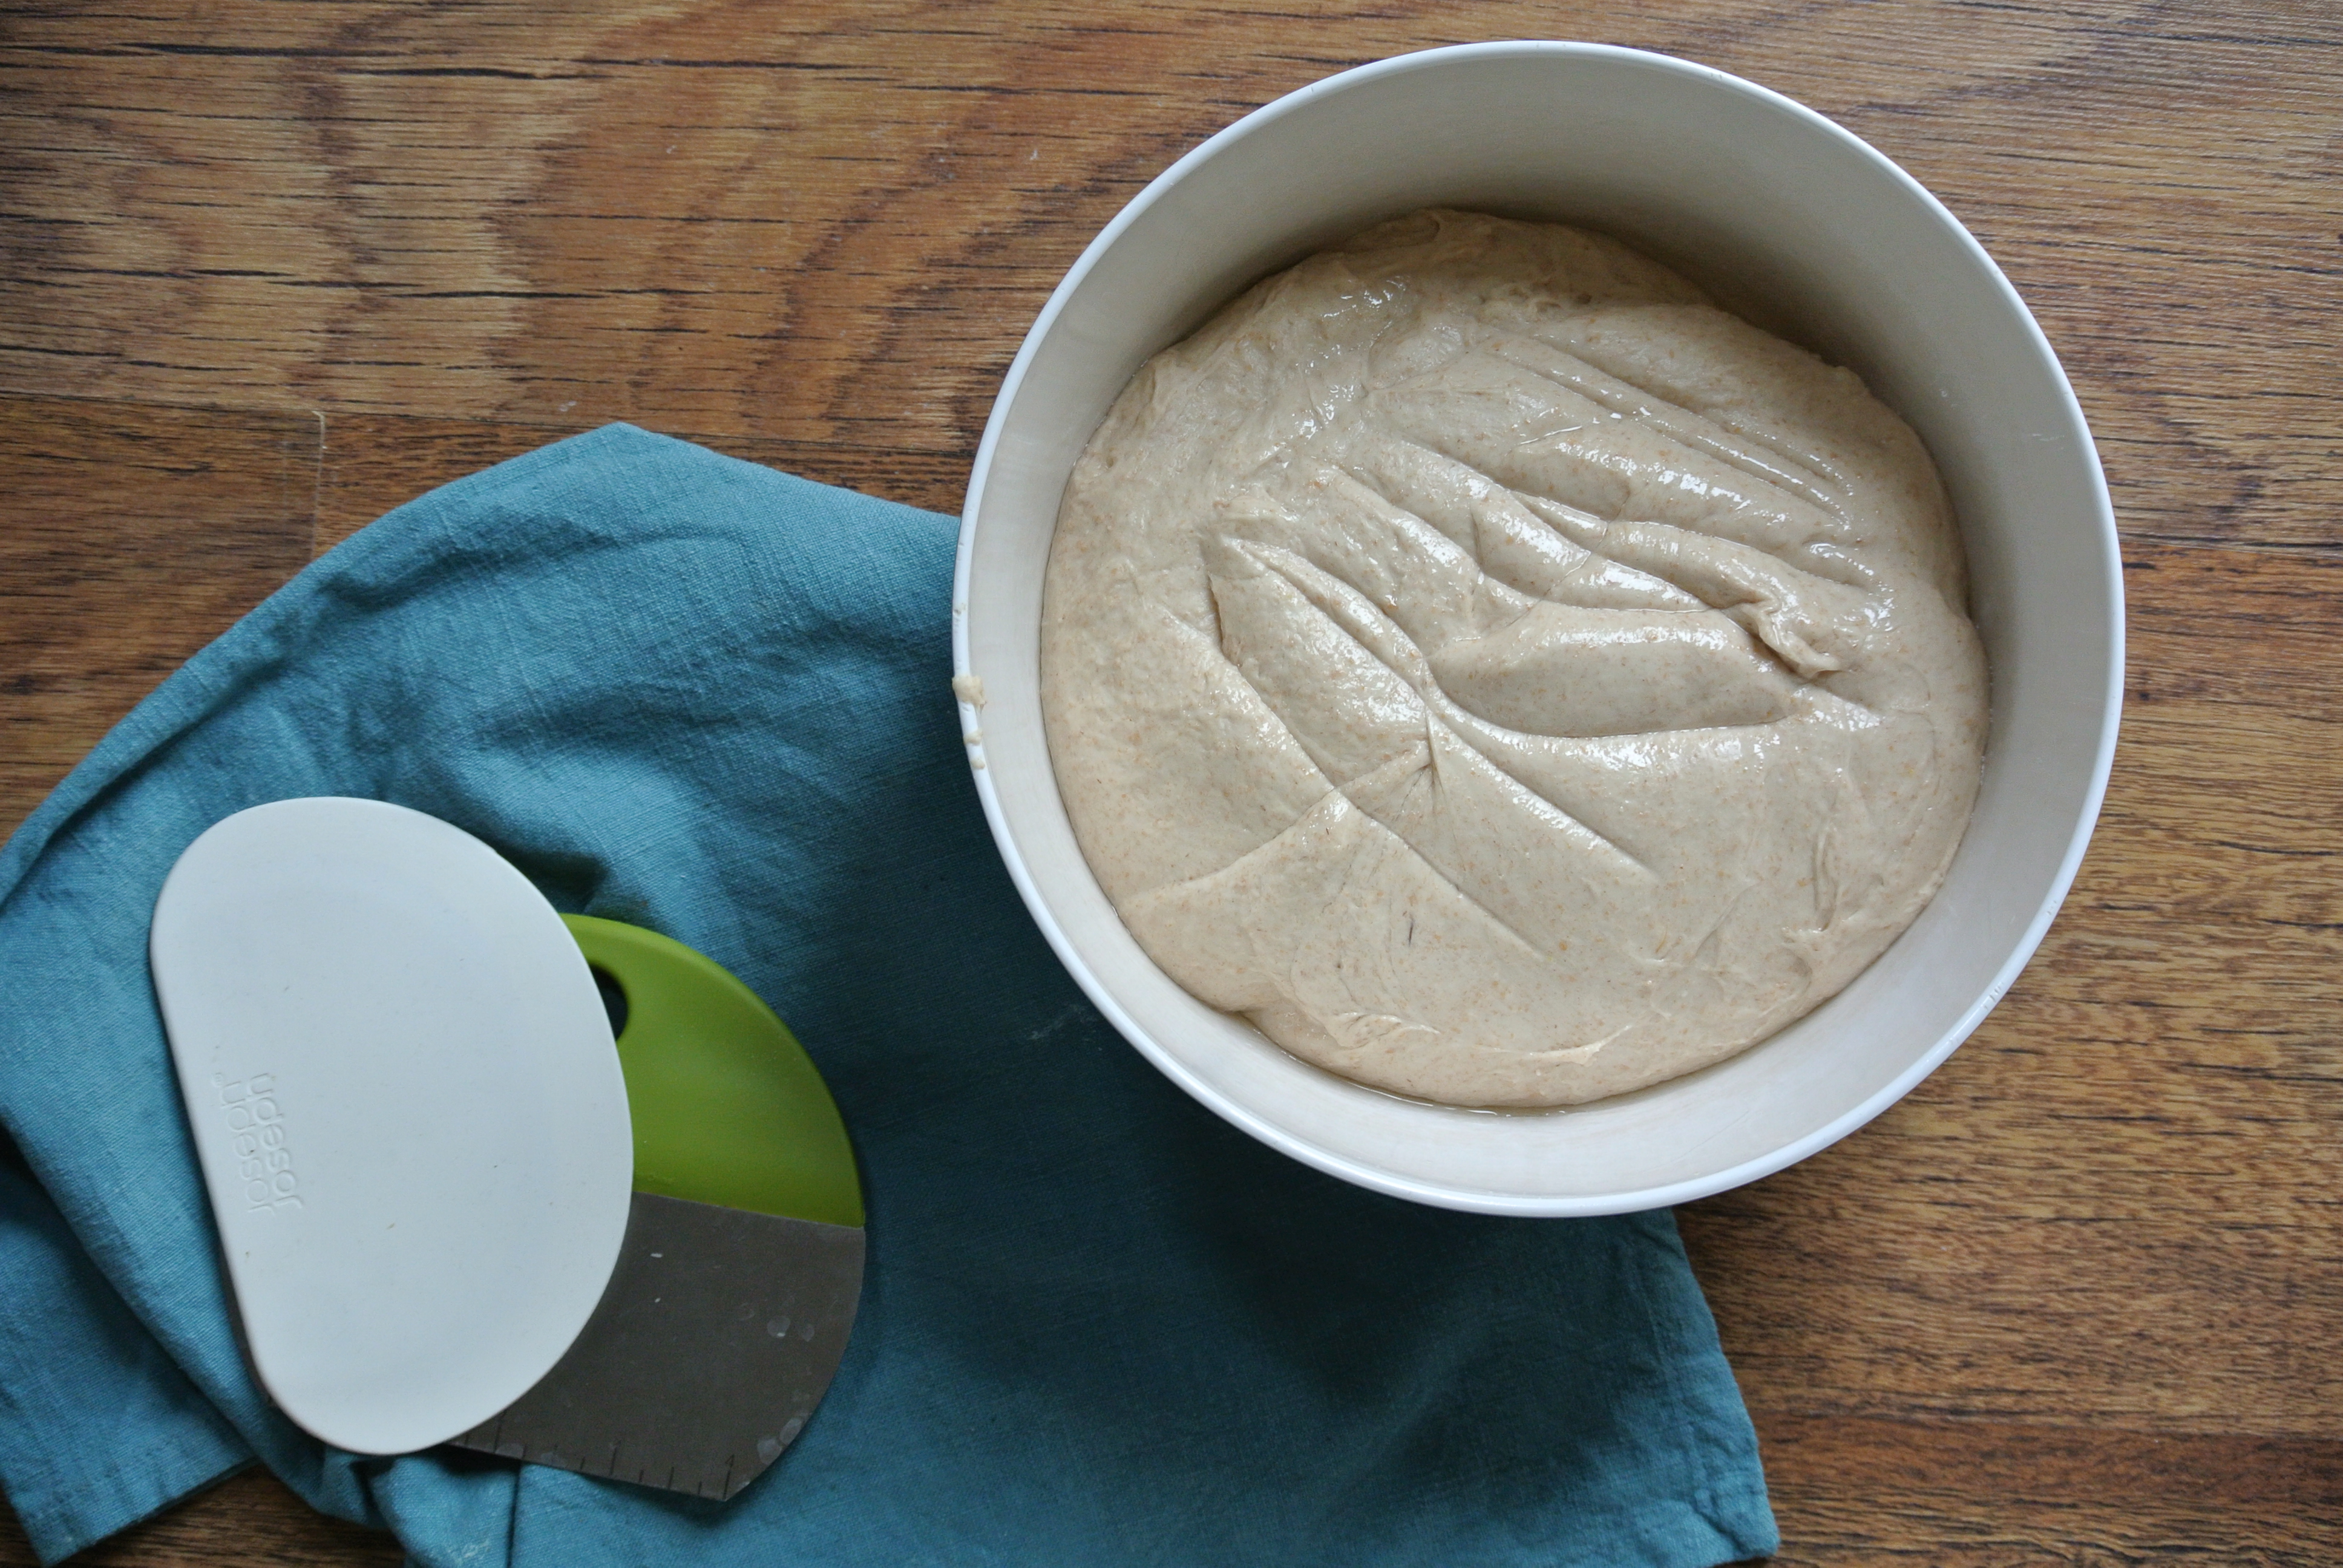
My method for stretch & fold involves oiling lightly my work surface, tipping the dough (using a dough scraper is highly encouraged), then stretching it into a rectangle. Take left half of the dough and fold it halfway on top of the rest of the dough. Do the same with the other half, making sure the sides overlap fully. Turn on the side and do the same once more. This video will show this far better than I can explain it.
After 2 hours and 30 minutes, flour your work surface and tip the dough onto it. My quantity yields two loaves, so divide into two equal portions. Shape into a ball, sprinkle with more flour and cover with a clean tea towel. Leave to rest for 20 minutes.
Meanwhile, prepare your proofing baskets or bowls. I use bannetons for this stage so I go wild and flour them generously; you can also use a deep bowl but you’ll need to drape a heavily floured tea towel inside to ensure the dough will not stick.
After 20 minutes’ rest, give a final shape to the two dough portions and place each in respective banneton. Sprinkle more flour on top and cover with plastic wrap and a tea towel. You can leave in a warm spot for 3 – 4 hours for their final proof, or, if you have the time – I mean, you’ve already taken 6 hours to get to this stage, what’s another 8?! – leave to proof for 1 hour then put in a refrigerator for 8 – 12 hours. If choosing to retard in refrigerator, you’ll need to bring the dough back to room temperature before baking, therefore allow 1 – 2 extra hours when you get it out for this stage.
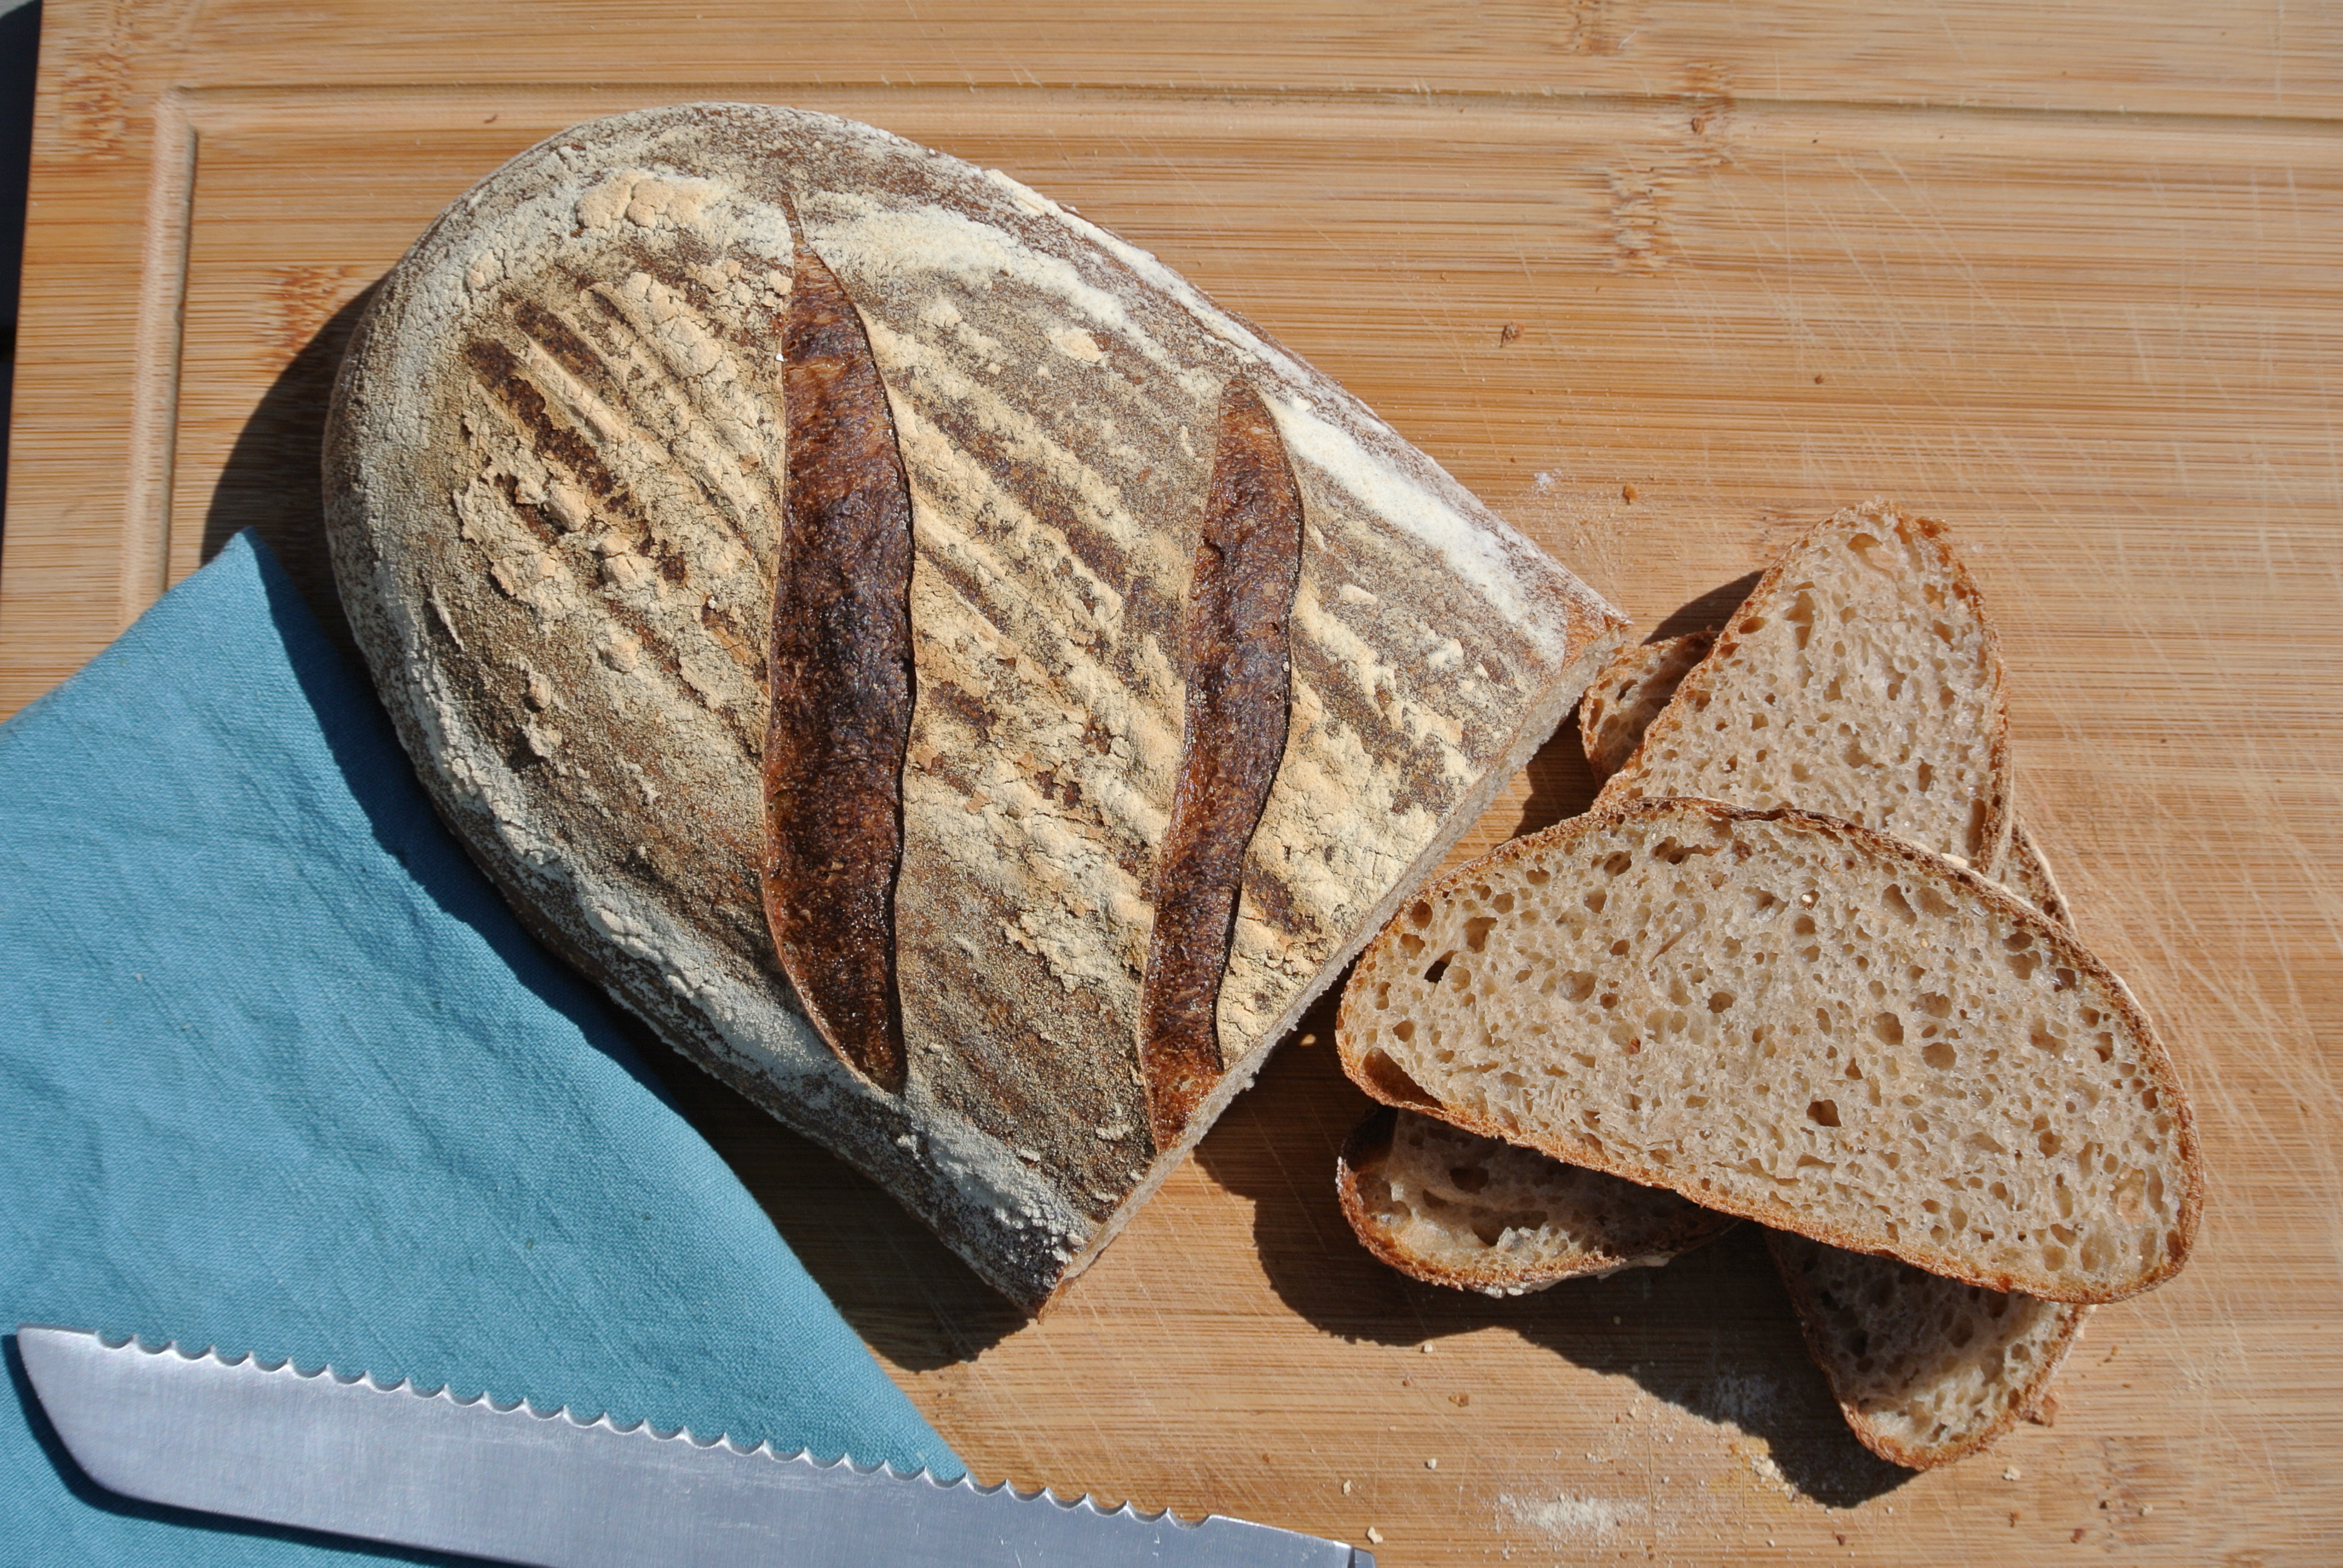
Finally… the moment you’ve been waiting for! You’re ready to bake the bread. Well, almost. Crank the heat in your oven at the max (mine goes up to 240C; if yours goes up to 250C even better) and allow 30 – 40 minutes for oven to reach the temperature. Place a tray on the bottom of the oven to warm up. Place baking shelf in the lower third of the oven, to avoid the bread browning too quickly. Fill your kettle and bring to boil. When ready, turn the dough onto a heavy bottomed tray, sprinkled with flour or semolina. Score depending on the shape. Place the tray in the oven with one hand. With the other, pour boiling water from the kettle into the tray you’ve heated up at the bottom of the oven and close the oven door super quickly. This creates steam, which in turn creates that beautiful crust we love about sourdough.
Bake for 10 minutes at max temperature. Then lower the temperature to 220C, remove the water tray from the oven and continue to bake for 20 – 30 minutes, until the loaf is golden brown and the bottom sounds hollow when tapped.
Apparently you’re supposed to wait till the loaf is all cooled before you cut into it. If you manage that, you’re a better person than I am! Enjoy!

Awesome !
LikeLike
I’ve put a sourdough tips post on my blog. It is very addictive baking !
LikeLike
I have checked it out, super useful! Thanks!
LikeLiked by 1 person